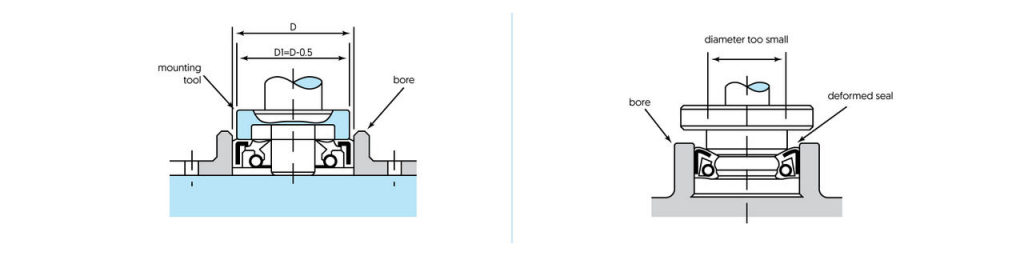
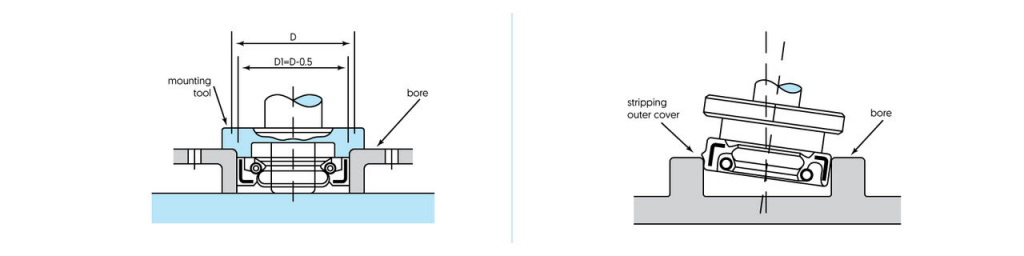
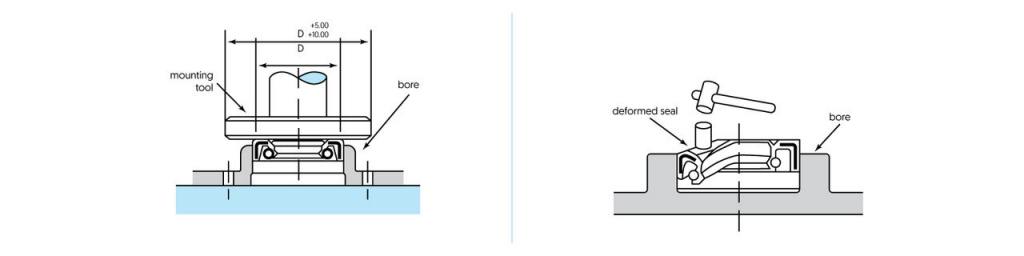
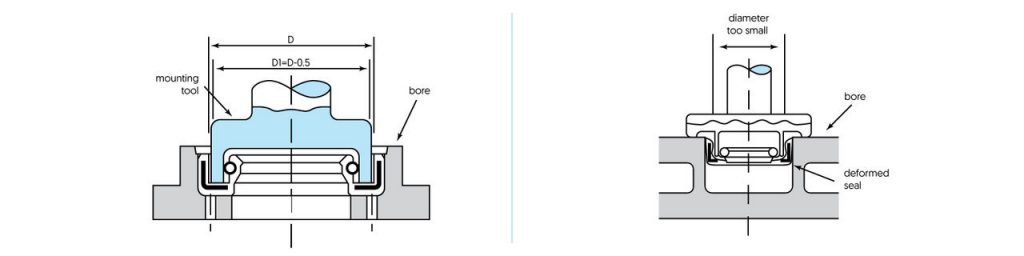
The oil seal serves as our primary defense in maintaining lubrication within the reducer, and it could also be deemed as the ultimate defense against keeping contaminants outside the reducer, where they should remain. Typically, the design of the seal is remarkably straightforward, consisting of a case, a lip or multiple lips, and often a garter spring. While some seals are undoubtedly more intricate and constructed with unusual materials, the vast majority maintain a basic structure.
The attention paid during the installation process will reap dividends, ensuring the seal functions silently and efficiently, unseen but crucial to the operation of your application.
Preparation
Before fitting the oil seal, it is essential to check that the oil seal, shaft and bore are clean and undamaged. The surfaces the oil seal will come into contact with must be free of sharp points or burrs. The sealing lip is fragile, so even minimal damage can cause a leak. It is also important that the shaft and bore are correctly finished.
Preparing the oil seal installation
Successful assembly first requires careful preparation. By following a few simple steps, you significantly increase the chances of a flawless assembly.
- 1. When repairing, remove the old oil seal
- 2. Select the correct oil seal size
- 3. Check the oil seal
- 4. Make a thorough inspection of surfaces in contact with oil seal
- 5. Gather the right assembly tools
Use the right assembly tools
Assembling the oil seals is only possible with the right assembly tools. Due to the high risk of damage during assembly, it is important that you have tools with which you can work carefully. A bearing fitting tool set is ideal.
Post time: Mar-21-2024